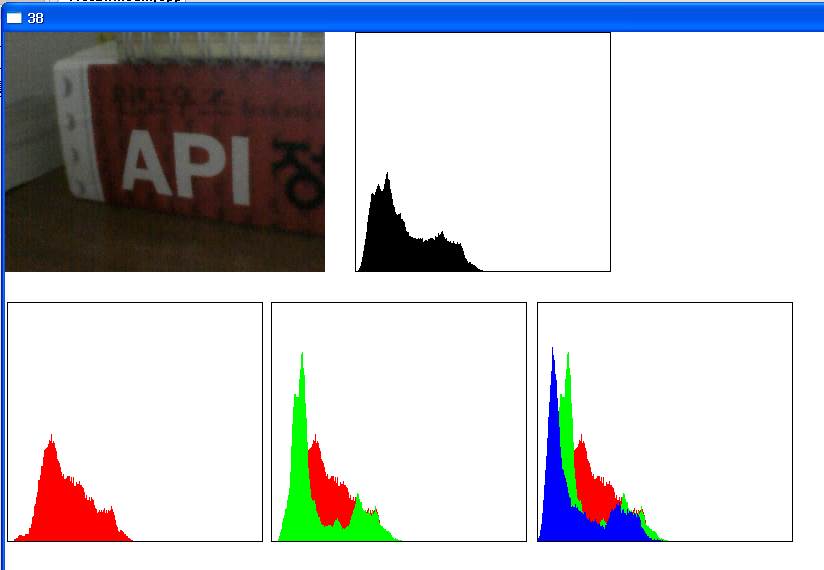
내소스는 완벽하다 . 캠이 구린거다 ㅋㅋㅋ
그렇게 믿고 싶다 -_-
#include <windows.h>
#include "resource.h"
#include <Vfw.h>
//#define PIXELHISTO 1
//#define LINEHISTO 1
#define ALLHISTO 1
LRESULT CALLBACK FramInfo(HWND , LPVIDEOHDR);
LRESULT CALLBACK WndProc(HWND,UINT,WPARAM,LPARAM);
BOOL CALLBACK DialogBoxProc(HWND,UINT,WPARAM,LPARAM);
void DrawBitmap(HDC, int, int, HBITMAP);
HINSTANCE g_hlnst;
LPCTSTR lpszClass=TEXT("WinCam");
HWND vfw;
HWND vfw2;
HWND Hwndmain;
int APIENTRY WinMain(HINSTANCE hlnstance,HINSTANCE hPrevlnstance,LPSTR lpszCmdParam,int nCmdShow)
{
HWND hWnd;
MSG Message;
WNDCLASS WndClass;
g_hlnst=hlnstance;
WndClass.cbClsExtra=0;
WndClass.cbWndExtra=0;
WndClass.hbrBackground=(HBRUSH)GetStockObject(WHITE_BRUSH);
WndClass.hCursor=LoadCursor(NULL,IDC_ARROW);
WndClass.hIcon=LoadIcon(NULL,IDI_APPLICATION);
WndClass.hInstance=hlnstance;
WndClass.lpfnWndProc=WndProc;
WndClass.lpszClassName=lpszClass;
WndClass.lpszMenuName=NULL;
WndClass.style=CS_HREDRAW|CS_VREDRAW;
RegisterClass(&WndClass);
hWnd=CreateWindow(lpszClass,
lpszClass,
WS_OVERLAPPEDWINDOW,
CW_USEDEFAULT,
CW_USEDEFAULT,
CW_USEDEFAULT,
CW_USEDEFAULT,
NULL,
(HMENU)NULL,
hlnstance,NULL);
ShowWindow(hWnd,nCmdShow);
while(GetMessage(&Message,NULL,0,0))
{
TranslateMessage(&Message);
DispatchMessage(&Message);
}
return (int)Message.wParam;
}
BITMAPINFO bm;
PAINTSTRUCT ps;
HBITMAP hbit;
DWORD dwsize;
HBITMAP OldBitmap;
HANDLE hFile;
u_char buf1[280000];
DWORD dwWrite;
DWORD dwRead;
int Temp;
LPBYTE lpData1;
u_int Histo[3][256];
LRESULT CALLBACK WndProc(HWND hWnd,UINT iMessage,WPARAM wParam,LPARAM lParam)
{
HDC hdc;
HDC hMemDC;
switch(iMessage)
{
case WM_CREATE:
hdc = GetDC(hWnd);
Hwndmain = hWnd;
vfw = capCreateCaptureWindow( TEXT("CAM")
,WS_CHILD | WS_VISIBLE
,0
,0
,500
,400
,hWnd
,0);
capDriverConnect(vfw, 0);
capPreviewRate(vfw, 1);
capPreview(vfw, TRUE);
capGetVideoFormat(vfw, &bm , sizeof(bm));
hbit = CreateCompatibleBitmap(hdc, bm.bmiHeader.biWidth, bm.bmiHeader.biHeight);
capSetCallbackOnFrame(vfw, FramInfo);
InvalidateRect(Hwndmain,NULL,TRUE);
ReleaseDC(hWnd, hdc);
return 0;
case WM_LBUTTONDOWN:
DialogBox(g_hlnst, MAKEINTRESOURCE(IDD_DIALOG1), hWnd, DialogBoxProc);
return 0;
case WM_PAINT:
hdc = BeginPaint(Hwndmain, &ps);
hMemDC= CreateCompatibleDC(hdc);
DeleteDC(hMemDC);
EndPaint(Hwndmain, &ps);
return 0;
case WM_DESTROY:
PostQuitMessage(0);
return 0;
}
return(DefWindowProc(hWnd,iMessage,wParam,lParam));
}
LRESULT CALLBACK FramInfo(HWND vfw, LPVIDEOHDR VideoHdr)
{
HDC hMemDC;
HDC hdc;
HBITMAP OldBitmap;
int iCntX;
int iCntY;
int Jump=0;
int R, G, B;
WCHAR t[100];
HBRUSH Myblush;
HBRUSH Oldblush;
HPEN MyPen;
HPEN OldPen;
hdc = GetDC(Hwndmain);
hMemDC = CreateCompatibleDC(hdc);
OldBitmap = (HBITMAP)SelectObject(hMemDC,hbit);
Myblush = CreateSolidBrush(RGB(255,255,255));
Oldblush = (HBRUSH)SelectObject(hMemDC, Myblush);
memset(Histo, 0, sizeof(Histo));
for(iCntY= 0; iCntY < bm.bmiHeader.biHeight ; ++iCntY)
{
for(iCntX=0; iCntX < bm.bmiHeader.biWidth ; ++iCntX )
{
++Histo[0][(VideoHdr->lpData[Jump + 2])];
++Histo[1][(VideoHdr->lpData[Jump + 1])];
++Histo[2][(VideoHdr->lpData[Jump + 0])];
Jump += 3;
}
}
wsprintf(t, TEXT("%d"), Histo[0][0]+Histo[1][0]+Histo[2][0]);
SetWindowText(Hwndmain, t);
MyPen = CreatePen(PS_SOLID, 1, RGB(0,0,0));
OldPen = (HPEN)SelectObject(hMemDC, MyPen);
// RGB 히스토그램
Rectangle(hMemDC, 0, 0, 256 , bm.bmiHeader.biHeight);
for(iCntY= 0; iCntY < 255 ; ++iCntY)
{
#ifdef PIXELHISTO
// 점버전
SetPixel(hMemDC, iCntY+25, bm.bmiHeader.biHeight - ((((Histo[0][iCntY])+(Histo[1][iCntY])+(Histo[2][iCntY]))/15)/3), RGB(0,0,0));
#endif
#ifdef LINEHISTO
// 선버전
MoveToEx(hMemDC, iCntY+25, bm.bmiHeader.biHeight - ((((Histo[0][iCntY])+(Histo[1][iCntY])+(Histo[2][iCntY]))/15)/3), NULL);
LineTo(hMemDC, iCntY+25, bm.bmiHeader.biHeight - ((((Histo[0][iCntY+1])+(Histo[1][iCntY+1])+(Histo[2][iCntY+1]))/15)/3));
#endif
#ifdef ALLHISTO
// 면버전
MoveToEx(hMemDC,iCntY+1, bm.bmiHeader.biHeight - ((((Histo[0][iCntY])+(Histo[1][iCntY])+(Histo[2][iCntY]))/15)/3), NULL);
LineTo(hMemDC, iCntY+1, bm.bmiHeader.biHeight);
#endif
}
BitBlt(hdc, bm.bmiHeader.biWidth+30, 0, 256 , bm.bmiHeader.biHeight, hMemDC, 0, 0, SRCCOPY);
//RED값 히스토그램
MyPen = CreatePen(PS_SOLID, 1, RGB(0,0,0));
(HPEN)SelectObject(hMemDC, MyPen);
Rectangle(hMemDC, 0, 0, 256 , bm.bmiHeader.biHeight);
MyPen = CreatePen(PS_SOLID, 1, RGB(255,0,0));
(HPEN)SelectObject(hMemDC, MyPen);
for(iCntY= 0; iCntY < 255 ; ++iCntY)
{
#ifdef PIXELHISTO
// 점버전
SetPixel(hMemDC, iCntY+25, bm.bmiHeader.biHeight - ((Histo[0][iCntY])/15), RGB(0,0,0));
#endif
#ifdef LINEHISTO
// 선버전
MoveToEx(hMemDC, iCntY+25, bm.bmiHeader.biHeight - ((Histo[0][iCntY])/15), NULL);
LineTo(hMemDC, iCntY+25, bm.bmiHeader.biHeight - ((Histo[0][iCntY+1])/15));
#endif
#ifdef ALLHISTO
// 면버전
MoveToEx(hMemDC,iCntY, bm.bmiHeader.biHeight - ((Histo[0][iCntY])/15), NULL);
LineTo(hMemDC, iCntY, bm.bmiHeader.biHeight-1);
#endif
}
BitBlt(hdc, 2, bm.bmiHeader.biHeight+30, 256 , bm.bmiHeader.biHeight, hMemDC, 0, 0, SRCCOPY);
//GREEN값 히스토그램
MyPen = CreatePen(PS_SOLID, 1, RGB(0,0,0));
(HPEN)SelectObject(hMemDC, MyPen);
// Rectangle(hMemDC, 0, 0, 256 , bm.bmiHeader.biHeight);
MyPen = CreatePen(PS_SOLID, 1, RGB(0,255,0));
(HPEN)SelectObject(hMemDC, MyPen);
for(iCntY= 0; iCntY < 255 ; ++iCntY)
{
#ifdef PIXELHISTO
// 점버전
//SetPixel(hMemDC, iCntY+25, bm.bmiHeader.biHeight - ((Histo[1][iCntY])/15), RGB(0,0,0));
#endif
#ifdef LINEHISTO
// 선버전
MoveToEx(hMemDC, iCntY+25, bm.bmiHeader.biHeight - ((Histo[1][iCntY])/15), NULL);
LineTo(hMemDC, iCntY+25, bm.bmiHeader.biHeight - ((Histo[1][iCntY+1])/15));
#endif
#ifdef ALLHISTO
// 면버전
MoveToEx(hMemDC,iCntY, bm.bmiHeader.biHeight - ((Histo[1][iCntY])/15), NULL);
LineTo(hMemDC, iCntY, bm.bmiHeader.biHeight-1);
#endif
}
BitBlt(hdc, 256+10, bm.bmiHeader.biHeight+30, 256 , bm.bmiHeader.biHeight, hMemDC, 0, 0, SRCCOPY);
//BLUE값 히스토그램
MyPen = CreatePen(PS_SOLID, 1, RGB(0,0,0));
(HPEN)SelectObject(hMemDC, MyPen);
// Rectangle(hMemDC, 0, 0, 256 , bm.bmiHeader.biHeight);
MyPen = CreatePen(PS_SOLID, 1, RGB(0,0,255));
(HPEN)SelectObject(hMemDC, MyPen);
for(iCntY= 0; iCntY < 255 ; ++iCntY)
{
#ifdef PIXELHISTO
// 점버전
//SetPixel(hMemDC, iCntY+25, bm.bmiHeader.biHeight - ((Histo[2][iCntY])/15), RGB(0,0,0));
#endif
#ifdef LINEHISTO
// 선버전
MoveToEx(hMemDC, iCntY+25, bm.bmiHeader.biHeight - ((Histo[2][iCntY])/15), NULL);
LineTo(hMemDC, iCntY+25, bm.bmiHeader.biHeight - ((Histo[2][iCntY+1])/15));
#endif
#ifdef ALLHISTO
// 면버전
MoveToEx(hMemDC,iCntY, bm.bmiHeader.biHeight - ((Histo[2][iCntY])/15), NULL);
LineTo(hMemDC, iCntY, bm.bmiHeader.biHeight-1);
#endif
}
BitBlt(hdc, (256+10)<<1, bm.bmiHeader.biHeight+30, 256 , bm.bmiHeader.biHeight, hMemDC, 0, 0, SRCCOPY);
SelectObject(hMemDC, Oldblush);
DeleteObject(Myblush);
SelectObject(hMemDC, OldPen);
DeleteObject(MyPen);
SelectObject(hMemDC,OldBitmap);
DeleteDC(hMemDC);
ReleaseDC(Hwndmain,hdc);
return 0;
}
BOOL CALLBACK DialogBoxProc(HWND hDlg,UINT iMessage,WPARAM wParam,LPARAM lParam)
{
TCHAR str[20] = {};
switch(iMessage)
{
case WM_COMMAND:
switch (wParam)
{
case IDOK:
GetDlgItemText(hDlg, IDC_EDIT1, str, sizeof(str));
capFileSaveDIB(vfw,str);
case IDCANCEL:
EndDialog(hDlg,0);
return TRUE;
}
break;
}
return FALSE;
}


